
Transforming an open rooftop area into a space that can be used throughout the year involves more than selecting structural profiles, glazing, and a roof covering. Rainwater must be safely directed away from the structure, the existing waterproofing must be protected, and the new system must connect continuously with the building envelope. In a roof terrace winter garden project, poor coordination between slopes, drains, anchoring points, and junction details may cause ponding, dampness, heat loss, and condensation on interior surfaces.
A reliable solution begins with examining the terrace’s structural condition, elevations, drains, and existing waterproofing layers. The route followed by rainwater, the roof slope, gutter dimensions, and downpipe locations must then be planned. Waterproofing and thermal insulation should not be treated as temporary additions applied after installation. They need to form part of the original design so that the enclosed terrace remains comfortable while the risk of long-term damage to the building is reduced.
Why Should Water Drainage and Insulation Be Planned Together in a Roof Terrace Winter Garden?
Drainage removes rainwater from the roof surface, while waterproofing layers prevent residual moisture from reaching the building structure. Even a high-quality membrane may deteriorate over time when junctions remain continuously exposed to ponding caused by insufficient drainage. Likewise, installing larger gutters alone cannot prevent leakage through poorly completed parapet, wall, or profile connections. Both systems must therefore be designed as complementary parts of the same protective structure.
In a properly planned project, the roof covering, gutters, drains, downpipes, membranes, and junction components work together. This coordination between winter garden water drainage and winter garden insulation helps prevent ponding, moisture penetration, staining, and material deterioration. A continuous route must be established from the point where rain reaches the roof to the final location where it can be safely discharged without affecting the façade, terrace surface, or neighbouring areas.
What Should Be Inspected on the Roof Terrace Before Installation?
The initial inspection should cover the load-bearing capacity of the terrace slab, the condition of the existing surface, parapet heights, drain locations, and connections with the building façade. Cracks, raised coatings, colour changes, or depressions around drains may indicate a previous water-related problem. Where the proposed glazing, profiles, and roof components will create additional structural loads, the suitability of the existing structure may also need to be verified by a qualified specialist.
Visible surfaces alone are not sufficient for a complete assessment. Door thresholds, service penetrations, chimney bases, wall junctions, and holes left by previous installations must also be examined. When the type and age of the terrace waterproofing system are known, compatible new details can be planned more accurately. Resolving existing defects before construction reduces the likelihood of extensive repairs in areas that will become difficult to access after the winter garden has been installed.
How Are Roof Terrace Slopes and Elevations Checked?
Slopes and elevations can be checked by comparing measurements taken at multiple points with a laser level, spirit level, or other suitable equipment. The highest and lowest parts of the slab, existing drain elevation, door threshold, and parapet level should be assessed together. Local depressions that could direct water away from the drainage point must be identified. The measured data should then be transferred to the design so that the roof, gutters, and outlets provide a continuous and unobstructed flow path.
How Is Existing Terrace Waterproofing Inspected?
Existing waterproofing should be checked for cracking, separation, blistering, open joints, and other visible deterioration. Controlled water testing or suitable moisture measurements may be used in areas where the source of a problem is unclear. The inspection should determine how far the membrane extends up the parapet, how it connects to drains, and whether continuity is maintained around planned installation points. Installing a new system directly over damaged layers may conceal the problem temporarily, but it will not eliminate the underlying cause.
How Is Water Drainage Solved in a Roof Terrace Winter Garden?
Rainwater should flow from the sloped roof surface into gutters and then into downpipes or suitable drainage lines. The design should account not only for typical rainfall but also for intense downpours that can create a large volume of water within a short period. The roof area, geometry, projections, and surrounding walls can all change how much water is directed toward a particular outlet. Using identical gutter and pipe dimensions for every project is therefore unsuitable.
The proposed winter garden drainage system must prevent water from being discharged randomly onto the façade or neighbouring surfaces. A secondary outlet or overflow solution should also be considered in case the primary line becomes blocked. Gutters need to remain accessible so that leaves and debris can be identified and removed. Once the system has been completed, controlled water should be introduced to verify flow direction, drainage speed, and the watertightness of all connections.
How Should Winter Garden Drainage Channels and Rain Gutters Be Positioned?
Drainage channels and gutters should be positioned at the lower elevations toward which the roof slope naturally directs water. Profile joints, columns, and decorative cladding must not narrow or obstruct the flow route. When concealed gutters are used, inspection and cleaning points should remain accessible. Water leaving the gutter should be carried through a closed downpipe to an existing stormwater system or another suitable discharge point instead of being allowed to run uncontrollably down the building façade.
How Is the Capacity of Drains and Rainwater Downpipes Determined?
Drain and downpipe capacity should be calculated according to the roof’s horizontal projected area, local rainfall intensity, the number of collection points, and the configuration of the pipe route. Sharp bends, long horizontal sections, and narrow junctions may slow the flow, so pipe diameter cannot be considered in isolation. Capacity calculations should be completed by qualified professionals using site-specific conditions. Drain openings should also remain accessible so that they can be inspected and cleared during routine maintenance.
Why Is an Emergency Overflow Drain Necessary?
Leaves, ice, or foreign materials may block the primary drain and cause the water level to rise quickly. An emergency overflow allows accumulated water to escape before it reaches vulnerable thresholds, glazing connections, or profile joints. It should operate independently of the primary drainage line, and its elevation must be determined according to the project levels. A visible overflow outlet is also useful because water emerging from it indicates that the main line may be blocked and requires prompt maintenance.
How Is the Correct Slope Created on a Winter Garden Roof?
The roof slope must allow water to move toward the gutters without forming puddles on the covering. The required gradient varies according to whether the roof uses glass, insulated panels, a retractable system, or another covering material. A single slope ratio should not be applied to every roof. Manufacturer requirements, span dimensions, snow and wind loads, and the positions of the drainage points must all be evaluated when determining the correct gradient.
The slope must continue through valleys, gutters, and junction channels rather than being limited to the main roof plane. Even a small profile or connector that creates a reverse gradient may retain water in a localised area. After installation, controlled water should be released from several points to observe the flow. If water remains around corners, gaskets, or roof joints, the levels should be corrected before the final trims and covers are installed.
How Is Waterproofing Applied in a Roof Terrace Winter Garden?
Waterproofing should extend continuously from the terrace slab to parapets, wall junctions, drain surrounds, and structural mounting bases. The selected waterproofing material must be compatible with the existing surface, environmental conditions, and upper covering system. Applying sealant only to visible joints does not create a complete waterproofing solution. The primary water barrier must be formed with suitable layers, while sealants and gaskets should support the system at connection details.
The application surface must be clean, structurally sound, and within the required moisture limits. Fillets or reinforcing components may be needed at sharp corners to prevent the membrane from cracking. Continuity is especially important around drains, mounting bases, and wall returns. A winter garden water leakage problem commonly results from local application defects such as inadequate overlaps, incomplete membrane returns, blocked drainage outlets, or uncontrolled penetrations rather than the overall quality of the chosen material.
In What Order Are Terrace Waterproofing Layers Applied?
Although the layer sequence varies according to the existing slab and chosen system, it generally includes surface preparation, slope correction, primer, primary waterproofing, reinforced details, and a protective upper layer. The positions of the thermal insulation and vapour control layer must also be determined according to whether a warm-roof or inverted-roof build-up is used. All products should be chemically and mechanically compatible, and the application and curing periods specified by their manufacturers must be followed.
How Is Waterproofing Provided at Parapet and Wall Junctions?
The horizontal waterproofing layer should return up the parapet or wall to an appropriate height, and its upper edge should be protected with a termination detail that prevents water from passing behind it. Internal corners may be reinforced with compatible tape or an additional membrane layer. No open route should remain between the wall surface and waterproofing. Coping profiles, cover flashings, or drip edges can also help prevent water running down the wall from placing unnecessary pressure on the junction.
How Is Water Leakage Prevented Beneath Winter Garden Profiles?
A compatible mounting base, continuous membrane return, and controlled sealing around mechanical connections should be used instead of relying only on silicone beneath profiles. Internal drainage channels in the profiles must remain open so that any collected water can be discharged. Screws and anchors should be installed only at predetermined points and completed with suitable sealing components. Cover profiles should also be positioned so that rainwater is directed away from the connection rather than toward it.
Can Winter Garden Installation Damage Existing Terrace Waterproofing?
Existing waterproofing may be punctured or compressed if the installation method is not properly planned. Openings made while securing profile bases can become weak points through which water reaches the terrace layers. This risk can be controlled when anchoring details and the waterproofing system are designed together. However, structural connections must not be reduced or removed arbitrarily merely to avoid penetrations, as doing so could compromise the stability and wind resistance of the enclosure.
Where the build-up beneath the existing surface is unknown, a small inspection area may need to be opened. This helps determine the structural substrate reached by the anchors and the method required to restore waterproofing around them. Covering only the head of a screw is not sufficient. The mounting base, membrane returns, seals, and protective cap must work together. A controlled water test after installation can reveal defects before they become concealed beneath final finishes.
How Is Waterproofing Protected at Anchor Points?
Anchor locations should be determined by evaluating the load-bearing structure and existing waterproofing layers together. Drilled holes must be cleaned, compatible sealant should be applied around the fixing, and the membrane should return around or over the mounting base. Raised bases may be used to prevent water from remaining directly around the anchor. The protective cover should direct water away from the fixing, while potential corrosion caused by contact between dissimilar metals must also be considered.
Can a Winter Garden Be Installed Without Drilling?
On some terraces, weighted bases or independent supporting substructures may reduce the need to penetrate existing waterproofing. However, a non-penetrating solution is not suitable for every building. Wind uplift, overall weight, structural geometry, and the load-bearing capacity of the terrace must all be evaluated. Omitting secure structural connections solely to protect the membrane can create a serious safety risk. The installation method should therefore be selected through project-specific structural and waterproofing assessments.
How Is Thermal Insulation Provided in a Roof Terrace Winter Garden?
Thermal insulation is achieved by creating a continuous envelope across the roof, façade glazing, profiles, floor, and building junctions. High performance in only one component is insufficient. For example, insulated glazing may still provide poor overall comfort if metal profiles lack thermal breaks and become cold bridges. Similarly, a well-insulated roof cannot compensate for unsealed door thresholds or open wall connections that allow substantial heat and air movement.
Material selection should reflect how the space will be used. A winter garden heated throughout the year requires a different thermal performance level from an area used only during spring and autumn. Glazing area, solar orientation, shading requirements, and the heating system should be considered together. This coordinated approach reduces heat loss in winter while limiting excessive solar gain during summer, producing a more comfortable and energy-conscious enclosed space.
Which Materials Are Used for Winter Garden Roof Insulation?
Depending on the roof type, the build-up may include thermal insulation boards, insulated sandwich panels, insulated glass units, compatible waterproofing membranes, and vapour control layers. Selection should not be based solely on thermal conductivity. Compressive strength, fire performance, moisture resistance, and compatibility with surrounding materials are also important. Layer thicknesses must reflect the climate and intended use, while insulation should be protected from direct water exposure by suitable waterproofing and protective layers.
How Do Glazing and Profile Selection Affect Thermal Insulation?
The number of glass panes, cavity width, coatings, and edge components influence overall heat transfer through the glazing unit. Solar-control coatings can limit summer heat gain, while low-emissivity coatings may improve winter performance. Thermally broken profiles reduce direct heat conduction between interior and exterior metal surfaces. The continuity of gaskets between glass and profiles is equally important because these components affect both air tightness and the temperature of the internal surfaces.
How Are Condensation and Surface Moisture Prevented in a Roof Terrace Winter Garden?
Condensation occurs when humid indoor air meets a cold surface and is often confused with rainwater leakage. Droplets appearing on the internal surface of glazing, metal profiles, or roof junctions must therefore be investigated carefully. Indoor temperature, relative humidity, and surface temperature should be considered together. Renewing external sealant alone may not resolve the issue if the water develops during occupancy rather than during rainfall.
Continuous insulation, reduced thermal bridging, and controlled ventilation help lower the risk of condensation. Air exchange becomes especially important when the area contains plants, cooking facilities, or many occupants. Irregular heating can also allow internal surfaces to become excessively cold. A balanced combination of heating, suitable glazing, thermally efficient profiles, and effective ventilation helps manage indoor moisture and limits the formation of droplets on cold surfaces.
How Are Thermal Bridges Prevented in a Winter Garden?
Thermal bridges commonly occur where metal profiles connect directly to the building slab, insulation layers are interrupted, or glass edges are poorly protected. These areas can be improved with thermally broken profiles, insulated mounting bases, and continuous infill details. Gaps at roof and wall junctions should be filled with suitable materials, while internal and external sealing layers should complement each other. The relevant details should be resolved in sectional drawings before installation begins.
How Does Ventilation Reduce Condensation?
Ventilation removes accumulated humid air and helps keep indoor relative humidity under control. Opening windows, roof vents, or mechanical ventilation may be selected according to the size and occupancy of the space. Briefly opening one window may not always provide sufficient air exchange. Positioning air inlets and outlets across from each other improves natural circulation, while controlled ventilation options can be considered in heated spaces where unnecessary energy loss should be limited.
How Is Water Entry Prevented at Door Thresholds and Façade Junctions?
Door thresholds are among the areas where water on an external terrace can most easily enter the interior. The outside surface should slope away from the threshold, and a linear drainage channel should be installed in front of the door where necessary. Drainage openings within the threshold profile must remain clear. When a flush transition is required, the low-threshold detail needs additional drainage protection. Door gaskets alone may be insufficient on exposed terraces affected by wind-driven rain.
At façade junctions, cover flashings, drip edges, gaskets, and sealants must be applied in the correct order. A cover profile should be fixed to a stable surface to prevent water running down the wall from passing behind it. Cracks or damaged render must be repaired before the connection is formed. Flexible joints should accommodate the different thermal movement of adjoining materials, while access must remain available for sealants and gaskets that require periodic inspection.
In What Order Should a Roof Terrace Winter Garden Be Installed?
The process should begin with a site survey, accurate measurement, structural assessment, and preparation of construction details. Existing substrate defects should be repaired before slope adjustments and primary waterproofing work are completed. Structural bases, profile frames, roof components, glazing, and finishing elements can then be installed. Gutters, downpipes, and drainage connections should be coordinated with the roof assembly so that completed waterproofing layers do not need to be drilled or disturbed later.
After installation, gaskets, membrane returns, drains, gutters, and junction points should be inspected individually. Controlled water testing can first be carried out in smaller areas and then across the entire roof. Door operation, profile drainage openings, and potential air leakage should also be checked. Final decorative covers should be completed only after the tests have produced satisfactory results. Photographing concealed construction details creates a useful reference for future maintenance or repair work.
What Common Installation Mistakes Cause Water Leakage in Winter Gardens?
Insufficient roof slope, undersized gutters, reverse gradients, and blocked profile drainage openings are common causes of water problems. Other risks include failing to return the membrane sufficiently up walls, leaving anchor penetrations unprotected, and interrupting waterproofing around drains. Some installations depend almost entirely on surface-applied sealant. Exterior joints require maintenance and movement capacity, so sealant should support the primary waterproofing system rather than replace it.
The absence of an emergency overflow may allow water to rise to the level of thresholds and profile connections when the main drain becomes blocked. Discharging roof water directly onto the façade can also create staining and dampness. Joints may open over time if the different movement rates of materials are ignored. Most of these problems can be prevented through detailed drawings before installation and comprehensive water testing before concealed connections and finishes are closed.
How Should Winter Garden Drainage and Waterproofing Systems Be Maintained?
Maintenance should cover gutters, drains, downpipes, overflow outlets, gasket junctions, flashings, and cover profiles. Leaves, dust, and debris carried by birds can accumulate in narrow sections and reduce drainage capacity. Cracked sealants, displaced gaskets, or deformed metal components should be repaired before they develop into larger problems. If access to the roof is required, the load limits of the roof covering must be respected, and workers should avoid stepping randomly on glazing or unsupported panels.
Inspections should not be limited to rainy periods. Seasonal transitions provide a suitable opportunity to clean drainage components and identify open connections. Damp stains, peeling finishes, and persistent odours inside the space should also be monitored. During repairs, deteriorated sealant should be removed and the surface prepared rather than applying new material directly over the old layer. Maintenance records can help identify the underlying cause when problems repeatedly appear at the same location.
How Often Should Winter Garden Gutters and Drains Be Cleaned?
Gutters and drains should be inspected before the rainy season and after periods of heavy leaf fall. Terraces located close to trees or exposed to significant dust may require more frequent cleaning. Drain covers should be removed, accumulated material cleared, and controlled water introduced to verify flow through the downpipe. Sharp tools should not be used where they could damage membranes or gaskets, and loose components identified during cleaning should be secured appropriately.
Which Signs Indicate That Waterproofing Should Be Inspected?
Stains appearing on ceilings or at wall bases after rainfall, musty odours, blistering finishes, and persistent moisture around profiles indicate that the waterproofing should be inspected. Gutter overflow, long-lasting ponding, and visibly separated sealant joints also require attention. The internal location where water becomes visible may not correspond to the external entry point because moisture can travel between construction layers. The route should be investigated systematically instead of sealing random surface areas.
What Determines Roof Terrace Winter Garden Insulation and Drainage Costs?
Costs depend on the terrace area, roof geometry, selected glazing and profile specifications, the condition of existing waterproofing, and the length of the rainwater route. Removing old finishes, rebuilding the slope layer, or relocating drainage points expands the project scope. Material handling conditions on upper floors, lifting equipment, and safe access arrangements may also affect the required labour, installation period, and overall project budget.
When assessing the cost of a roof terrace enclosure, the initial price of the upper structure should not be the only consideration. Subsequent removal and repair caused by insufficient drainage or defective waterproofing can be considerably more expensive. A reliable quotation should identify the selected system, insulation work, drainage components, installation details, and project boundaries separately. This allows different proposals to be compared on an equivalent technical basis and reduces uncertainty during construction.
How Does Tenteks Plan Water Drainage in Roof Terrace Winter Garden Projects?
Tenteks evaluates existing terrace elevations, parapets, drain positions, and the available discharge lines during the site survey. The route through which rainwater will move from the roof surface to the gutters and downpipes is planned according to the project dimensions. Areas where profile connections intersect with waterproofing layers are also assessed before installation so that coordinated details can be formed between the roof, façade, and terrace floor.
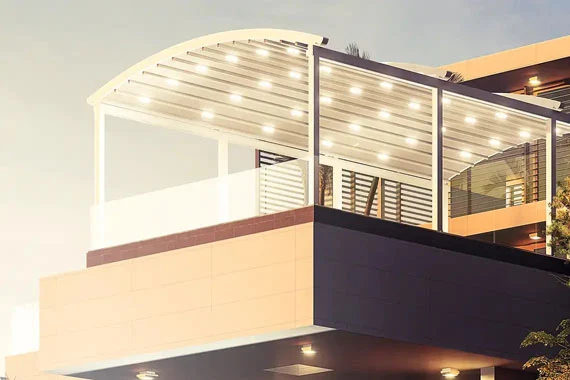
The proposed pergola and winter garden systems are evaluated according to the architectural characteristics of the terrace and the intended use of the space. Roof covering types, opening sections, glazing, and drainage components are coordinated within the same design. Testing gutters, junctions, and outlets with controlled water after installation helps reveal potential flow problems at an early stage. Rainwater management therefore becomes an integrated part of the system rather than a later addition.
How Is the Right Roof Terrace Winter Garden Solution Determined With Tenteks?
The terrace dimensions, structural characteristics, solar orientation, prevailing wind direction, intended usage period, and existing waterproofing conditions are considered together. Whether the area will function as a permanently occupied room or a seasonal space influences the selection of glazing, roofing, ventilation, and thermal details. Door locations, internal circulation, furniture arrangements, and maintenance access should also be coordinated with the technical design.
Tenteks defines the system dimensions and construction details using the information collected on site. Rainwater routes, profile layouts, and building connections are planned specifically for the project, while any necessary substrate or waterproofing preparation is identified before installation. Clearly presenting system components and installation boundaries in the quotation helps maintain technical expectations throughout the process. This approach allows architectural appearance, drainage performance, and thermal comfort to develop as complementary project requirements.
How Does the Roof Terrace Survey and Measurement Process Work?
During the survey, the width, length, height, slab elevations, parapet structure, façade connections, and drainage points are recorded. Door thresholds, service penetrations, and fixed elements that may affect installation are also measured. Photographs and measurement data are used to determine profile axes, roof direction, and drainage routes. Where necessary, structural verification or an inspection of the existing waterproofing by qualified specialists may be defined as a prerequisite before the installation begins.
How Can You Request a Quotation for a Winter Garden Project?
Terrace dimensions, location details, current photographs, and intended use can be shared to support the initial quotation process. The final technical scope is established after an on-site survey. Roof type, glazing options, opening sections, colours, drainage routes, and required waterproofing preparation should be stated separately in the proposal. When contacting Tenteks, providing information about year-round usage expectations and existing water-related problems helps the project team plan a more suitable solution.